 | HTML & XHTML: The Definitive Guide, 4th Edition |  |

Horizontal Rules
Inserting Images in Your Documents
Document Colors and Background Images
Background Audio
Animated Text
Other Multimedia Content
While the body of most documents is text, an appropriate seasoning of horizontal rules, images, and other multimedia elements make for a much more inviting and attractive document. These features are not simply gratuitous geegaws that make your documents look pretty, mind you. Multimedia elements bring HTML and XHTML documents alive, providing a dimension of valuable information often unavailable in other media, such as print. In this chapter, we describe in detail how you can insert special multimedia elements into your documents, when their use is appropriate, and how to avoid overdoing it.
You also might want to jump ahead and skim Chapter 12, "Executable Content". There we describe some catch-all tags, the HTML 4 and XHTML standard <object> and Netscape's <embed>, which let you insert all kinds of content and data file types, including multimedia, into your documents.
Horizontal rules give you a way to separate sections of your document visually. That way, you give readers a clean, consistent, visual indication that one portion of your document has ended and another portion is beginning. Horizontal rules effectively set off small sections of text, delimit document headers and footers, and provide extra visual punch to headings within your document.
The <hr> tag tells the browser to insert a horizontal rule across the display window. Like the <br> tag, <hr> forces a simple line break, although unlike <br>, <hr> causes the paragraph alignment to revert to the default (left-justified). The browser places the rule immediately below the current line, and content flow resumes below the rule. Section 4.7.1, "The <br> Tag"
<hr>
- Function:
Break a text flow and insert a horizontal rule
- Attributes:
ALIGN
ONMOUSEDOWN
CLASS
ONMOUSEMOVE
COLOR
ONMOUSEOUT
DIR
ONMOUSEOVER
ID
ONMOUSEUP
LANG
SIZE
NOSHADE
STYLE
ONCLICK
TITLE
ONDBLCLICK
WIDTH
ONKEYDOWN
ONKEYPRESS
ONKEYUP
- End tag:
None in HTML; </hr> or <hr ... /> with XHTML
- Contains:
Nothing
- Used in:
body_content
The rendering of a horizontal rule is at the discretion of the browser. Typically, it extends across the entire document. Graphical browsers may render the rule with a chiseled or embossed effect; character-based browsers most likely use dashes or underscores to create the rule.
There is no additional space above or below a horizontal rule. If you wish to set it off from the surrounding text, you must explicitly place the rule in a new paragraph, followed by another paragraph containing the subsequent text. For example, note the spacing around the horizontal rules in the following source and in Figure 5-1:
This text is directly above the rule.
<hr>
And this text is immediately below.
<p>
Whereas this text will have space before the rule.
<p>
<hr>
<p>
And this text has space after the rule.
A paragraph tag following the rule tag is necessary if you want the content beneath the rule line aligned in any style other than the default left.

Normally, browsers render horizontal rules two to three pixels[28] thick with a chiseled, 3D appearance, making the rule look incised into the page.
[28]A pixel is one of the many tiny dots that make up the display on your computer. While display sizes vary, a good rule of thumb is that one pixel equals one point on a 75 dot-per-inch display monitor. A point is a unit of measure used in printing and is roughly equal to 1/72 of an inch (there are 72.27 points in an inch, to be exact). Typical typefaces used by various browsers are usually 12 points tall, yielding six lines of text per inch.
You may thicken the rules with the size attribute. The required value is the thickness, in pixels. You can see the effects of this attribute in Figure 5-2 as constructed from the following source:
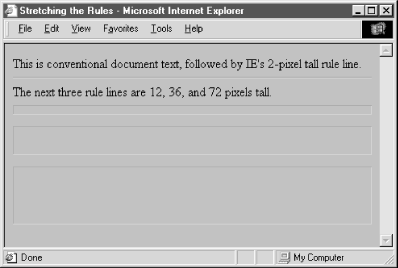
<p>
This is conventional document text,
followed by a IE's 2-pixel tall rule line.
<hr>
The next three rule lines are 12, 36, and 72 pixels tall.
<hr size=12>
<hr size=36>
<hr size=72>
The size attribute is deprecated in HTML 4 and XHTML, since its effects can be achieved with appropriate use of style sheets.
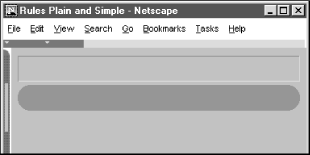
You may not want a 3D rule line, preferring a flat, 2D rule. Just add the noshade attribute to the <hr> tag to eliminate the effect. No value is required with HTML. Use noshade="noshade" with XHTML. Note the difference in appearance of a "normal" 3D rule versus the noshade 2D one in Figure 5-3. (We've also exaggerated the rule's thickness for obvious effect, as evident in the source HTML fragment.)
<hr size=32>
<p>
<hr size=32 noshade>
The noshade attribute is deprecated in HTML 4 and XHTML, since its effects can be achieved with appropriate use of style sheets.
The default rule is drawn across the full width of the view window. You can shorten or lengthen rules with the width attribute, creating rule lines that are either an absolute number of pixels wide or extend across a certain percentage of the current text flow. Most browsers automatically center partial-width rules; see the align attribute (Section 5.1.1.4, "The align attribute") to left- or right-justify horizontal rules.
Here are some examples of width-specified horizontal rules (see Figure 5-4):
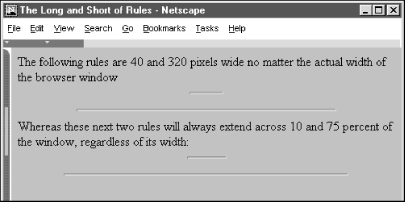
The following rules are 40 and 320 pixels wide
no matter the actual width of the browser window
<hr width=40>
<hr width=320>
Whereas these next two rules will always extend across
10 and 75 percent of the window, regardless of its width:
<hr width="10%">
<hr width="75%">
Notice, too, that the relative (percentage) value for the width attribute is enclosed in quotation marks; the absolute (integer) pixel value is not. In fact, the quotation marks aren't absolutely necessary with standard HTML,[29] but since the percent symbol normally means that an encoded character follows, failure to enclose the percent width value in quotation marks may confuse other browsers and trash a portion of your rendered document.
[29]With XHTML, double quotes are required around all attribute values.
In general, it isn't a good idea to specify the width of a rule as an exact number of pixels. Browser windows vary greatly in their width, and what might be a small rule on one browser might be annoyingly large on another. For this reason, we recommend specifying rule width as a percentage of the window width. That way, when the width of the browser window changes, the rules retain their same relative size.
The width attribute is deprecated in HTML 4 and XHTML, since its effects can be achieved with appropriate use of style sheets.
The align attribute for a horizontal rule can have one of three values: left, center, or right. For those rules whose width is less than the current text flow, the rule will be positioned relative to the window margins accordingly. The default alignment is center.
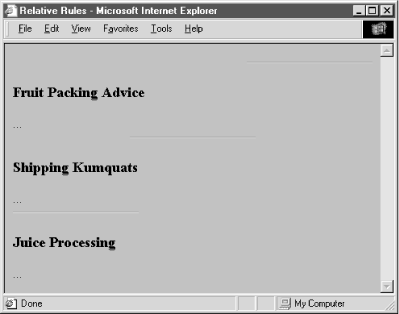
A varied rule alignment makes for nice section dividers. For example, the source shown below alternates a 35 percent-wide rule from right to center to the left margin (see Figure 5-5):
<hr width="35%" align=right>
<h3>Fruit Packing Advice</h3>
...
<hr width="35%" align=center>
<h3>Shipping Kumquats</h3>
...
<hr width="35%" align=left>
<h3>Juice Processing</h3>
...
The align attribute is deprecated in HTML 4 and XHTML, since its effects can be achieved with appropriate use of style sheets.
Supported only by Internet Explorer, the color attribute lets you set the color of the rule line. The value of this attribute is either the name of a color or a hexadecimal triplet that defines a specific color. For a complete list of color names and values, see Appendix G, "Color Names and Values".
By default, a rule is set to the same color as the document background, with the chiseled edges slightly darker and lighter than the background color. You lose the 3D effect when you specify another color, either in a style sheet or with the color attribute.
You may combine the various rule attributes; their order isn't important. To create big rectangles, for example, combine the size and width attributes (see Figure 5-6):
<hr size=32 width="50%" align=center>
In fact, some combinations of rule attributes are necessary -- align and width, for example. Align alone appears to do nothing because the default rule width stretches all the way across the display window.
There are several nearly universal attributes for the many content tags. These attributes give you a common way to identify (title) and label (id) a tag's contents for later reference or automated treatment, to change the contents' display characteristics (class, style), and to reference the language (lang) used and related direction the text should flow (dir). Of course, how language and the direction of text affect a horizontal rule is unclear. Nonetheless, they are standard attributes for the tag.
[See also: Section 3.6.1.1, "The dir attribute" Section 3.6.1.2, "The lang attribute" Section 4.1.1.4, "The id attribute" Section 4.1.1.5, "The title attribute" Section 8.1.1, "Inline Styles: The style Attribute" Section 8.3, "Style Classes"]
In addition, there are all the user events that may happen in and around the horizontal rule that the browser senses and that you may react to via an on-event attribute and some programming. Section 12.3.3, "JavaScript Event Handlers"
Horizontal rules provide a handy visual navigation device for your readers. To use <hr> effectively as a section divider, first determine how many levels of headings your document has and how long you expect each section of the document to be. Then decide which of your headings warrant being set apart by a rule.
A horizontal rule can also delimit the front matter of a document, separating the table of contents from the document body, for example. Use a horizontal rule also to separate the document body from a trailing index, bibliography, or list of figures.
Experienced authors also use horizontal rules to mark the beginning and end of a form. This is especially handy for long forms that make users scroll up and down the page to view all the fields. By consistently marking the beginning and end of a form with a rule, you help users stay within the form, better ensuring they won't inadvertently miss a portion when filling out its contents.
A fundamental style approach to creating document families is to have a consistent look and feel, including a standard header and footer for each document. Typically, the header contains navigational tools that help users easily jump to internal sections as well as related documents in the family, while the footer contains author and document information as well as feedback mechanisms like an email link to the webmaster.
To ensure that these headers and footers don't infringe on the main document contents, consider using rules directly below the header and above the footer. For example (see also Figure 5-7):
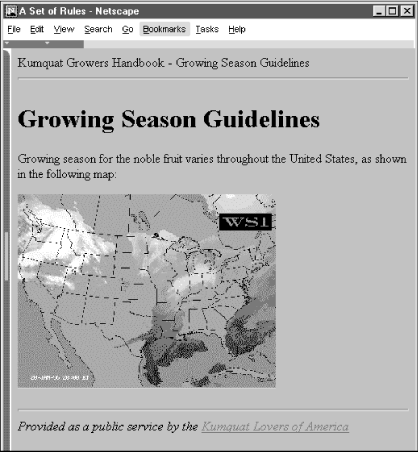
<body>
Kumquat Growers Handbook - Growing Season Guidelines
<hr>
<h1>Growing Season Guidelines</h1>
Growing season for the noble fruit varies throughout the
United States, as shown in the following map:
<p>
<img src="pics/growing-season.gif">
<p>
<hr>
<i>Provided as a public service by the
<a href="feedback.html">Kumquat Lovers of America</a></i>
By consistently setting apart your headers and footers using rules, you help users locate and focus upon the main body of your document.
|  | |
| 4.10. Special Character Encoding |  | 5.2. Inserting Images in Your Documents |

Copyright © 2002 O'Reilly & Associates. All rights reserved.
